Overview
The Credit & Billing Hub is your Vport wallet and billing center.
Here you can:
- Check your current balance (real currency)
- Add funds using preset bundles
- Apply voucher codes
- Pay using Apple Pay (Apple Vision Pro) or Stripe (Web)
- Review purchase history and usage history, including detailed event-level charges
This hub appears:
- As a full page on web
- As a billing modal inside the app when topping up
Purpose (User Value)
The Credit & Billing Hub is designed to:
- Make top-ups fast using preset bundles ($5, $10, $20)
- Provide a clear summary before payment
- Enable voucher redemption directly during checkout
- Offer transparent records for:
- How much you paid (purchase history)
- How your balance was used (usage history)
If you ever question a charge, you can open the hub, view the details, and reference the Charge ID when contacting Support.
How to Use (Step-by-step Guide)
3.1 Opening the Credit & Billing Hub
From your account (Web or Vision Pro):
- Log into your Vport account.
- Open your Wallet from the top or side menu.
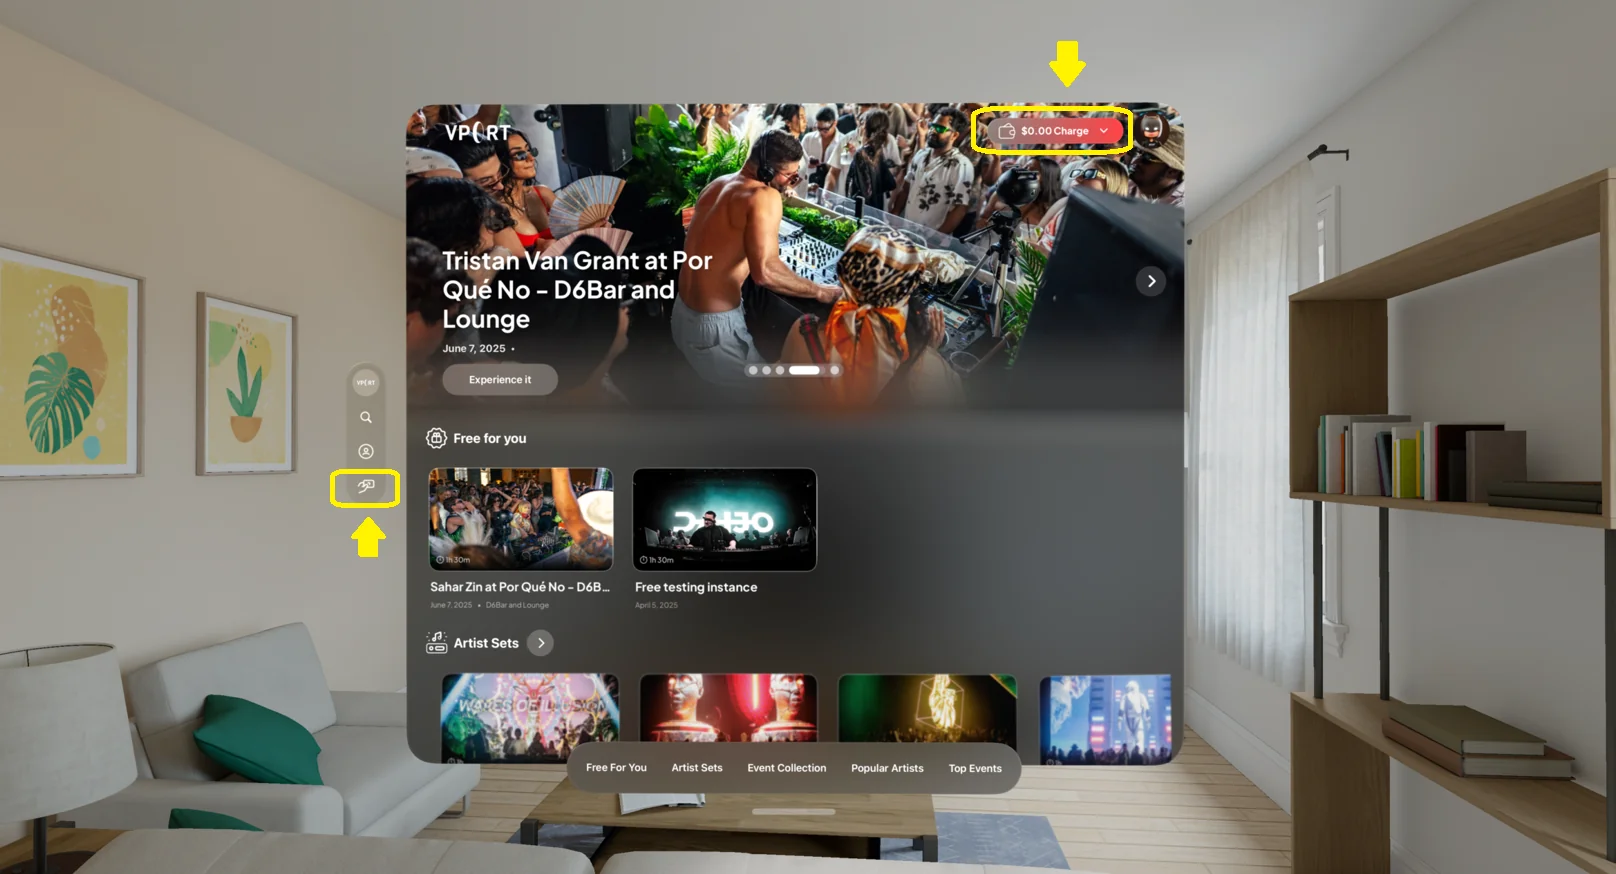
From a purchase flow:
- Start an event or experience requiring payment.
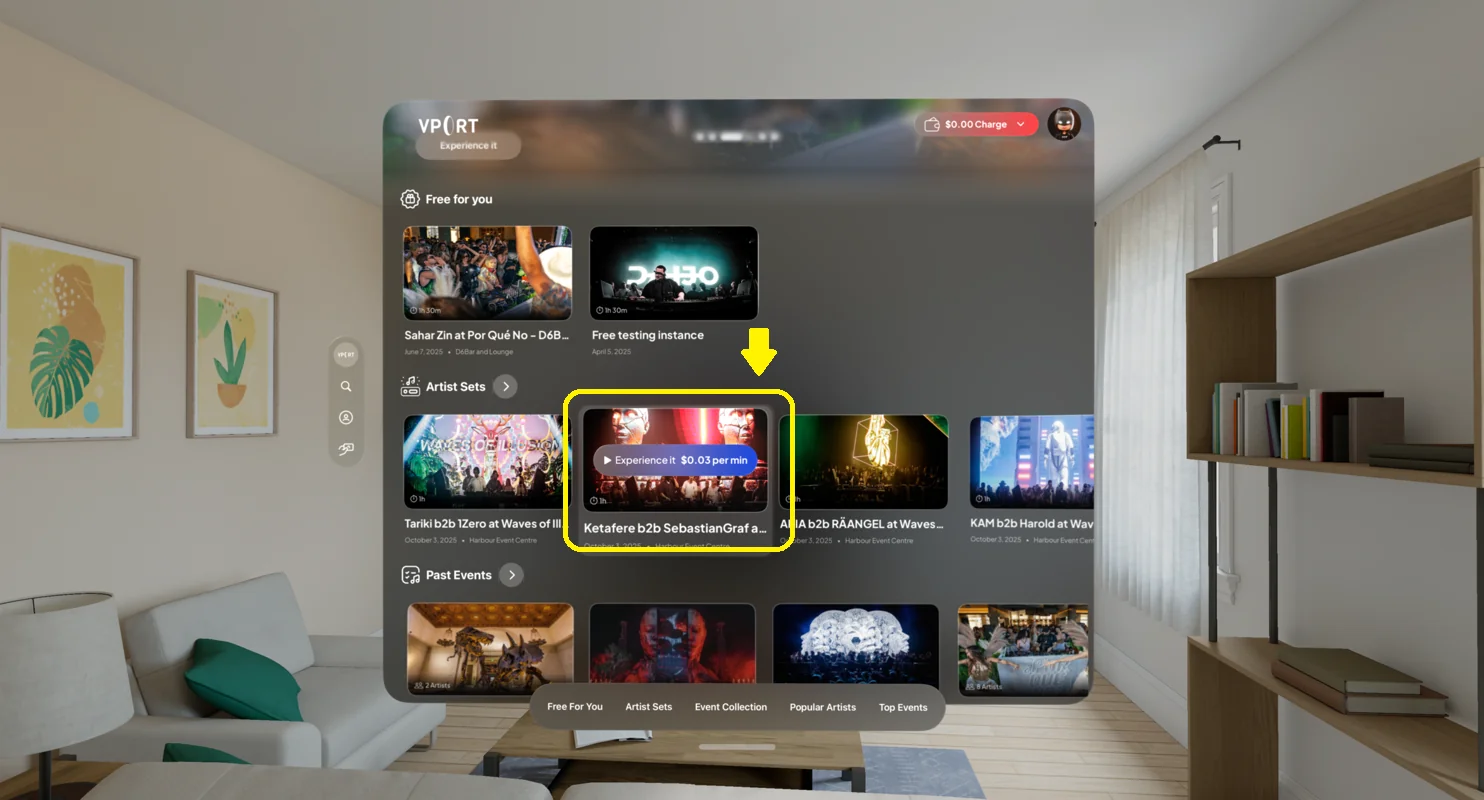
- If balance is low, you’ll see “Charge Wallet”.
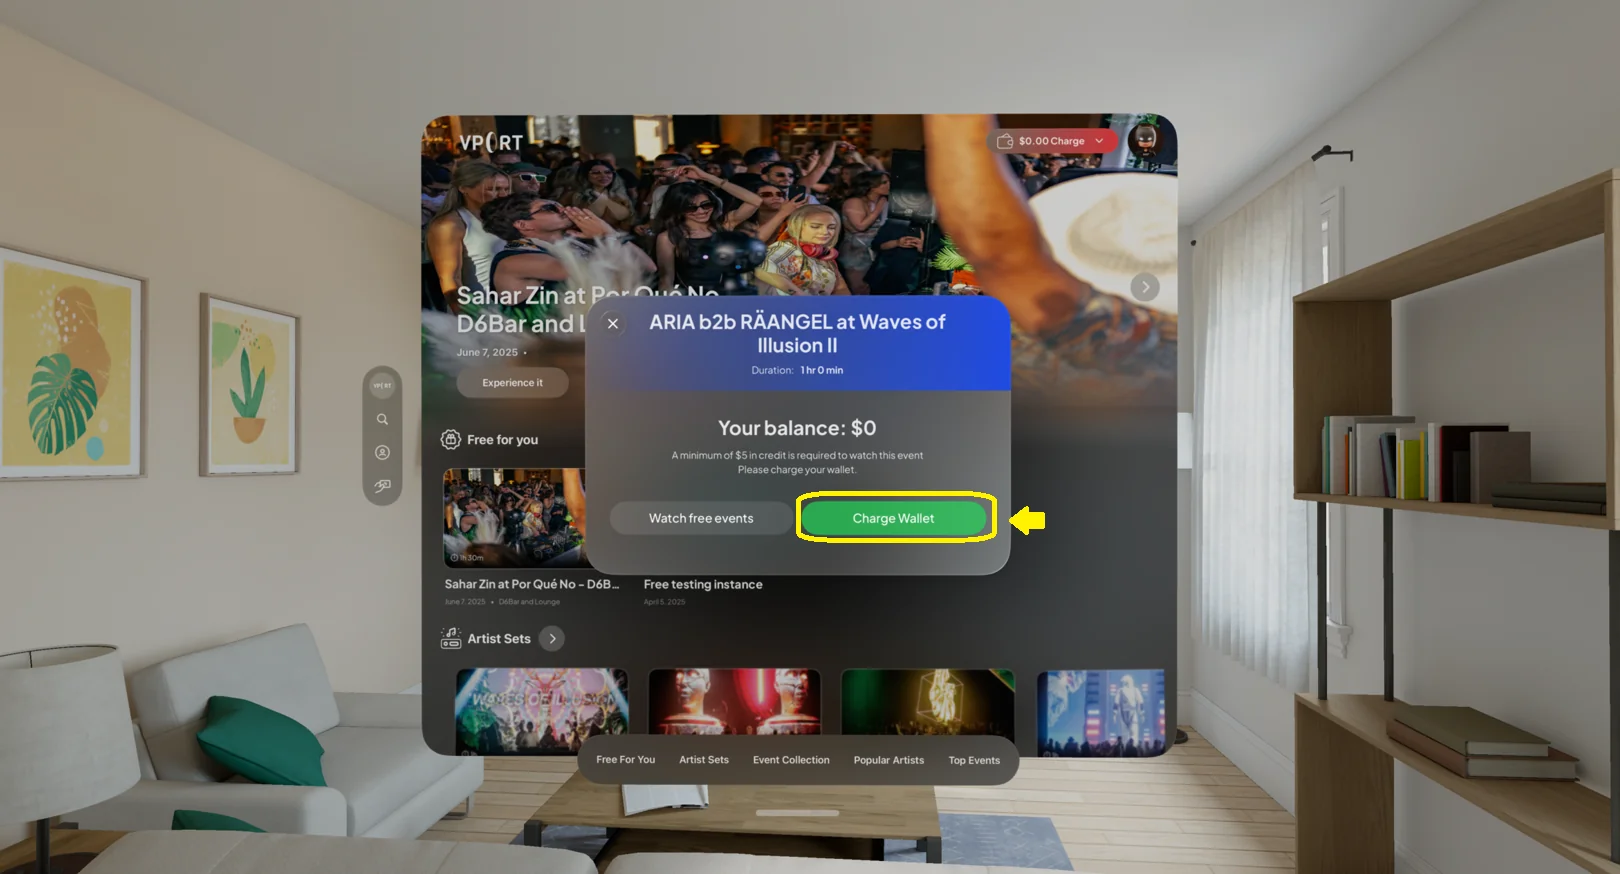
- Selecting it opens the Billing & Credit menu.
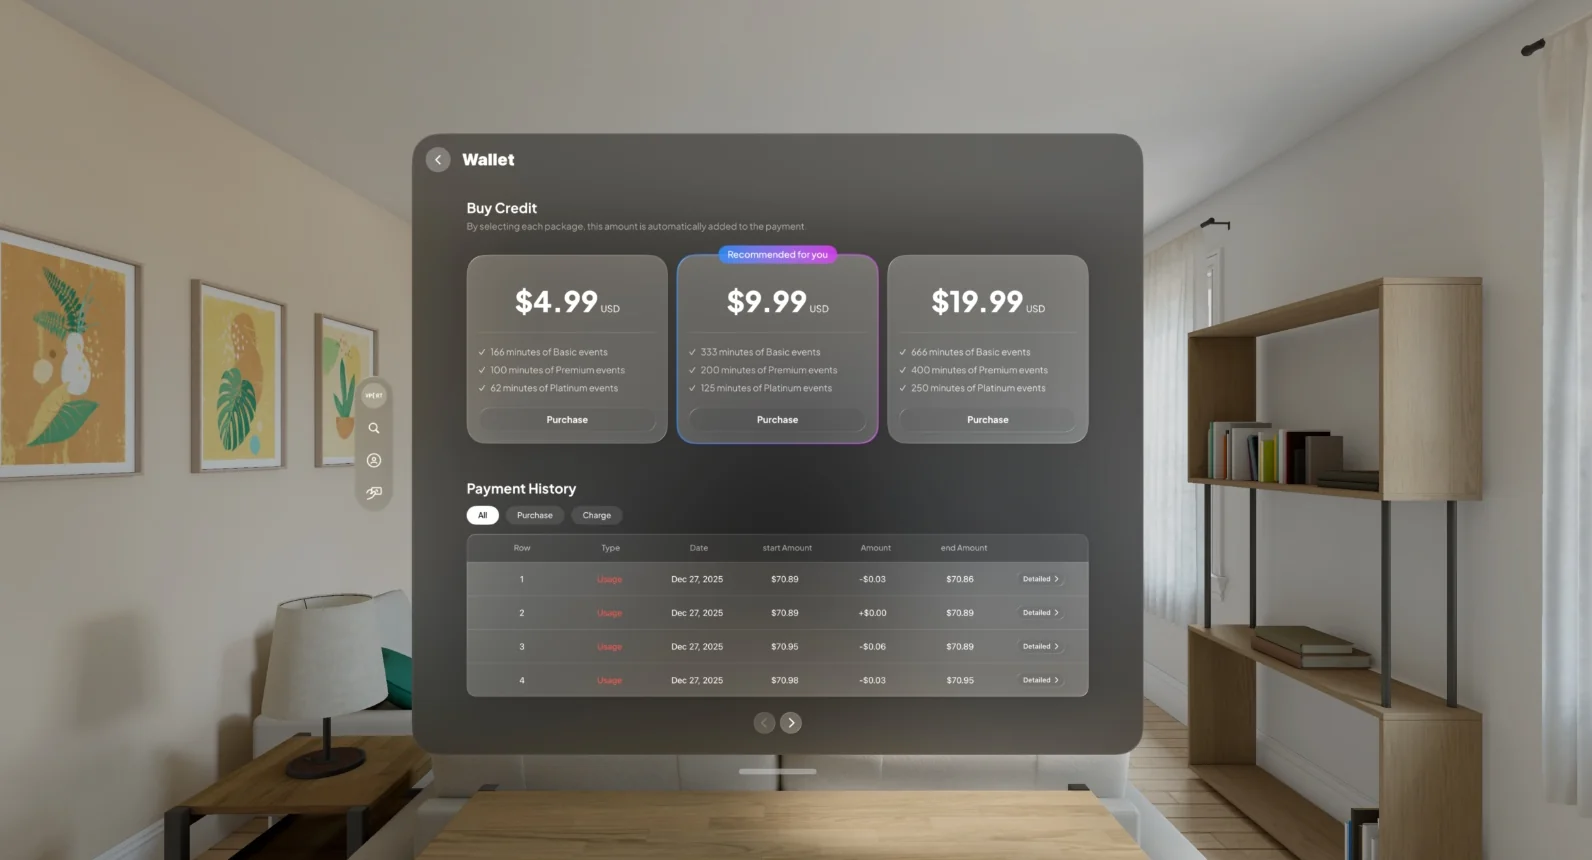
3.2 Choosing a Bundle ($5, $10, $20)
Present bundles:
- $5
- $10
- $20
To add funds:
- Select the desired bundle.
- Tap Purchase to open the summary modal.
3.3 Reviewing the Summary Modal & Applying a Voucher
The summary modal shows:
- Selected amount (e.g., $10.00)
- Final total before tax (e.g., $11.20)
Taxes are applied by the payment platform (Apple/Stripe) based on your region.
Voucher:
- Find Voucher / Promo Code field
- Enter the code
- Tap Apply
- If valid, the total updates
Note: Summary always shows the pre-tax amount.
3.4 Completing Payment (Apple Pay / Stripe)
On Apple Vision Pro (Apple Pay)
- Confirm through the standard Apple Pay flow
- After success → balance updates → purchase record created
On Web (Stripe)
- Confirm amount
- Stripe form appears
- Enter card details or use saved info
- After success → balance updates + record added to Purchase History
3.5 Viewing Purchase History
Purchase History includes:
- Date & time
- Amount charged (e.g., $10.00 + tax)
- Type (purchase or usage)
- Starting and ending balance
Use it to confirm:
- Payment was successful
- Amount matches summary modal
3.6 Viewing Usage History & Details
Usage History shows where funds were spent.
Each entry includes:
- Date & time
- Amount deducted
- Event/session attribution
Selecting Details shows:
- Event title + short description
- Total play time
- Pricing tier (pay-per-minute / flat event price)
- Session or Charge ID
If you dispute a charge:
- Open Usage History
- Tap Details
- Copy the Charge ID
- Contact Support with:
- Charge ID
- Account email
- Explanation
Key Features
Feature 1: Preset Top-Up Bundles
Fast top-ups via $5, $10, $20 bundles.
Feature 2: Clear Summary Modal
Shows:
- Selected amount
- Voucher applied
- Final amount before tax
Feature 3: Native Payments
- Apple Pay on Vision Pro
- Stripe on Web
Feature 4: Purchase & Usage Histories
Separate logs for:
- When you added money
- Where your balance was used
Feature 5: Usage Details with Charge ID
View:
- Event description
- Play time
- Pricing tier
- Charge ID for support
Common Issues & Troubleshooting
Issue 1: Voucher Code Not Applying
Possible causes:
- Typo or extra spaces
- Code expired
- Code not valid for selected bundle
- Code already used
Try:
- Copy-paste and remove spaces
- Switch bundle tier
- Check promo rules
- Contact Support with a screenshot
Issue 2: Final Amount Higher Than Bundle Price
Cause:
Regional taxes applied by Apple/Stripe.
Solution:
If tax seems incorrect, screenshot the summary and contact Support.
Issue 3: Apple Pay / Stripe Payment Fails
Possible causes:
- Card declined
- Weak internet
- Provider outage
Try:
- Check internet
- Re-authenticate Apple Pay
- Try another card
- Re-check Stripe inputs
Issue 4: Balance Didn’t Update After Payment
Possible causes:
- Delay in sync
- UI not refreshed
Try:
- Reopen the Hub
- Check Purchase History
- If mismatch: send Support
- Purchase screenshot
- Bank confirmation
Issue 5: Not Understanding a Usage Charge
Steps:
- Open Usage History
- Tap Details
- Review event + play time + pricing tier
- If unclear:
- Copy Charge ID
- Contact Support
Related Articles / Links
- How Pricing & Watching Time Work in Vport
- How to Purchase an Event or Experience
- Refunds & Charge Disputes
- Managing Your Vport Account & Login
[Actual URLs will be added after Help Center publishing]